


VoltAgent is an end-to-end AI Agent Engineering Platform. The open-source TypeScript framework handles Memory, RAG, tools, and agent runtime; VoltOps delivers observability, automation, and deployment for production. (This repository contains the core framework.)
Together, you can build agents with full code control and ship them with production-ready visibility and operations.
- End-to-End Development Platform: Everything you need to build, observe, and deploy production-ready multi-agent systems in one place.
- Production-Ready from Day One: Ship agents with built-in memory, workflows, and observability instead of building infrastructure from scratch.
- Code with Confidence: Full TypeScript support with type-safe tools, automatic inference, and compile-time safety across your entire agent system.
- Debug Like a Pro: Built-in VoltOps observability lets you trace every decision, monitor performance, and optimize workflows in real-time without external tools.
- Build Complex Systems Simply: Orchestrate multi-agent teams with supervisor coordination, declarative workflows, and modular architecture that scales from prototypes to production.
- Automate with Actions & Triggers: Connect agents to external events like webhooks, schedules, or custom triggers to run workflows automatically without manual intervention.
VoltAgent provides a complete platform for developing and monitoring AI agents through two complementary tools.
With the open-source framework, you can build intelligent agents with memory, tools, and multi-step workflows while connecting to any AI provider. Create sophisticated multi-agent systems where specialized agents work together under supervisor coordination.
- Core Runtime (
@voltagent/core): Define agents with typed roles, tools, memory, and model providers in one place so everything stays organized. - Workflow Engine: Describe multi-step automations declaratively rather than stitching together custom control flow.
- Supervisors & Sub-Agents: Run teams of specialized agents under a supervisor runtime that routes tasks and keeps them in sync.
- Tool Registry & MCP: Ship Zod-typed tools with lifecycle hooks and cancellation, and connect to Model Context Protocol servers without extra glue code.
- LLM Compatibility: Swap between OpenAI, Anthropic, Google, or other providers by changing config, not rewriting agent logic.
- Memory: Attach durable memory adapters so agents remember important context across runs.
- Retrieval & RAG: Plug in retriever agents to pull facts from your data sources and ground responses (RAG) before the model answers.
- VoltAgent Knowledge Base: Use the managed RAG service for document ingestion, chunking, embeddings, and search.
- Evals: Ship guardrails faster by running agent eval suites alongside your workflows.
VoltOps provides observability, automation, and deployment so you can monitor and debug agents in real-time with detailed execution traces, performance metrics, and visual dashboards.
You can use the MCP server @voltagent/mcp-docs-server to teach your LLM how to use VoltAgent for AI-powered coding assistants like Claude, Cursor, or Windsurf. This allows AI assistants to access VoltAgent documentation, examples, and changelogs directly while you code.
📖 How to setup MCP docs server
Create a new VoltAgent project in seconds using the create-voltagent-app CLI tool:
npm create voltagent-app@latestThis command guides you through setup.
You'll see the starter code in src/index.ts, which now registers both an agent and a comprehensive workflow example found in src/workflows/index.ts.
import { VoltAgent, Agent, Memory } from "@voltagent/core";
import { LibSQLMemoryAdapter } from "@voltagent/libsql";
import { createPinoLogger } from "@voltagent/logger";
import { honoServer } from "@voltagent/server-hono";
import { openai } from "@ai-sdk/openai";
import { expenseApprovalWorkflow } from "./workflows";
import { weatherTool } from "./tools";

// Create a logger instance
const logger = createPinoLogger({
  name: "my-agent-app",
  level: "info",
});

// Optional persistent memory (remove to use default in-memory)
const memory = new Memory({
  storage: new LibSQLMemoryAdapter({ url: "file:./.voltagent/memory.db" }),
});

// A simple, general-purpose agent for the project.
const agent = new Agent({
  name: "my-agent",
  instructions: "A helpful assistant that can check weather and help with various tasks",
  model: openai("gpt-4o-mini"),
  tools: [weatherTool],
  memory,
});

// Initialize VoltAgent with your agent(s) and workflow(s)
new VoltAgent({
  agents: {
    agent,
  },
  workflows: {
    expenseApprovalWorkflow,
  },
  server: honoServer(),
  logger,
});
Afterwards, navigate to your project and run:
npm run devWhen you run the dev command, tsx will compile and run your code. You should see the VoltAgent server startup message in your terminal:
══════════════════════════════════════════════════
VOLTAGENT SERVER STARTED SUCCESSFULLY
══════════════════════════════════════════════════
✓ HTTP Server: http://localhost:3141

Test your agents with VoltOps Console: https://console.voltagent.dev
══════════════════════════════════════════════════
Your agent is now running! To interact with it:
- Open the Console: Click the VoltOps LLM Observability Platform link in your terminal output (or copy-paste it into your browser).
- Find Your Agent: On the VoltOps LLM Observability Platform page, you should see your agent listed (e.g., "my-agent").
- Open Agent Details: Click on your agent's name.
- Start Chatting: On the agent detail page, click the chat icon in the bottom right corner to open the chat window.
- Send a Message: Type a message like "Hello" and press Enter.
step-3-test.mp4
Your new project also includes a powerful workflow engine.
The expense approval workflow demonstrates human-in-the-loop automation with suspend/resume capabilities:
import { createWorkflowChain } from "@voltagent/core";
import { z } from "zod";

export const expenseApprovalWorkflow = createWorkflowChain({
  id: "expense-approval",
  name: "Expense Approval Workflow",
  purpose: "Process expense reports with manager approval for high amounts",

  input: z.object({
    employeeId: z.string(),
    amount: z.number(),
    category: z.string(),
    description: z.string(),
  }),
  result: z.object({
    status: z.enum(["approved", "rejected"]),
    approvedBy: z.string(),
    finalAmount: z.number(),
  }),
})
  // Step 1: Validate expense and check if approval needed
  .andThen({
    id: "check-approval-needed",
    resumeSchema: z.object({
      approved: z.boolean(),
      managerId: z.string(),
      comments: z.string().optional(),
      adjustedAmount: z.number().optional(),
    }),
    execute: async ({ data, suspend, resumeData }) => {
      // If we're resuming with manager's decision
      if (resumeData) {
        return {
          ...data,
          approved: resumeData.approved,
          approvedBy: resumeData.managerId,
          finalAmount: resumeData.adjustedAmount || data.amount,
        };
      }

      // Check if manager approval is needed (expenses over $500)
      if (data.amount > 500) {
        await suspend("Manager approval required", {
          employeeId: data.employeeId,
          requestedAmount: data.amount,
        });
      }

      // Auto-approve small expenses
      return {
        ...data,
        approved: true,
        approvedBy: "system",
        finalAmount: data.amount,
      };
    },
  })
  // Step 2: Process the final decision
  .andThen({
    id: "process-decision",
    execute: async ({ data }) => {
      return {
        status: data.approved ? "approved" : "rejected",
        approvedBy: data.approvedBy,
        finalAmount: data.finalAmount,
      };
    },
  });
You can test the pre-built expenseApprovalWorkflow directly from the VoltOps console:
workflow.mp4
- Go to the Workflows Page: After starting your server, go directly to the Workflows page.
- Select Your Project: Use the project selector to choose your project (e.g., "my-agent-app").
- Find and Run: You will see "Expense Approval Workflow" listed. Click it, then click the "Run" button.
- Provide Input: The workflow expects a JSON object with expense details. Try a small expense for automatic approval:
{ "employeeId": "EMP-123", "amount": 250, "category": "office-supplies", "description": "New laptop mouse and keyboard" } - View the Results: After execution, you can inspect the detailed logs for each step and see the final output directly in the console.
For more examples, visit our examples repository.
- Airtable Agent - React to new records and write updates back into Airtable with VoltOps actions.
- Slack Agent - Respond to channel messages and reply via VoltOps Slack actions.
- ChatGPT App With VoltAgent - Deploy VoltAgent over MCP and connect to ChatGPT Apps.
- WhatsApp Order Agent - Build a WhatsApp chatbot that handles food orders through natural conversation. (Source)
- YouTube to Blog Agent - Convert YouTube videos into Markdown blog posts using a supervisor agent with MCP tools. (Source)
- AI Ads Generator Agent - Generate Instagram ads using BrowserBase Stagehand and Google Gemini AI. (Source)
- AI Recipe Generator Agent - Create personalized cooking suggestions based on ingredients and preferences. (Source | Video)
- AI Research Assistant Agent - Multi-agent research workflow for generating comprehensive reports. (Source | Video)
VoltOps Console is the platform side of VoltAgent where you get comprehensive observability, automation, and deployment for your agents in production.
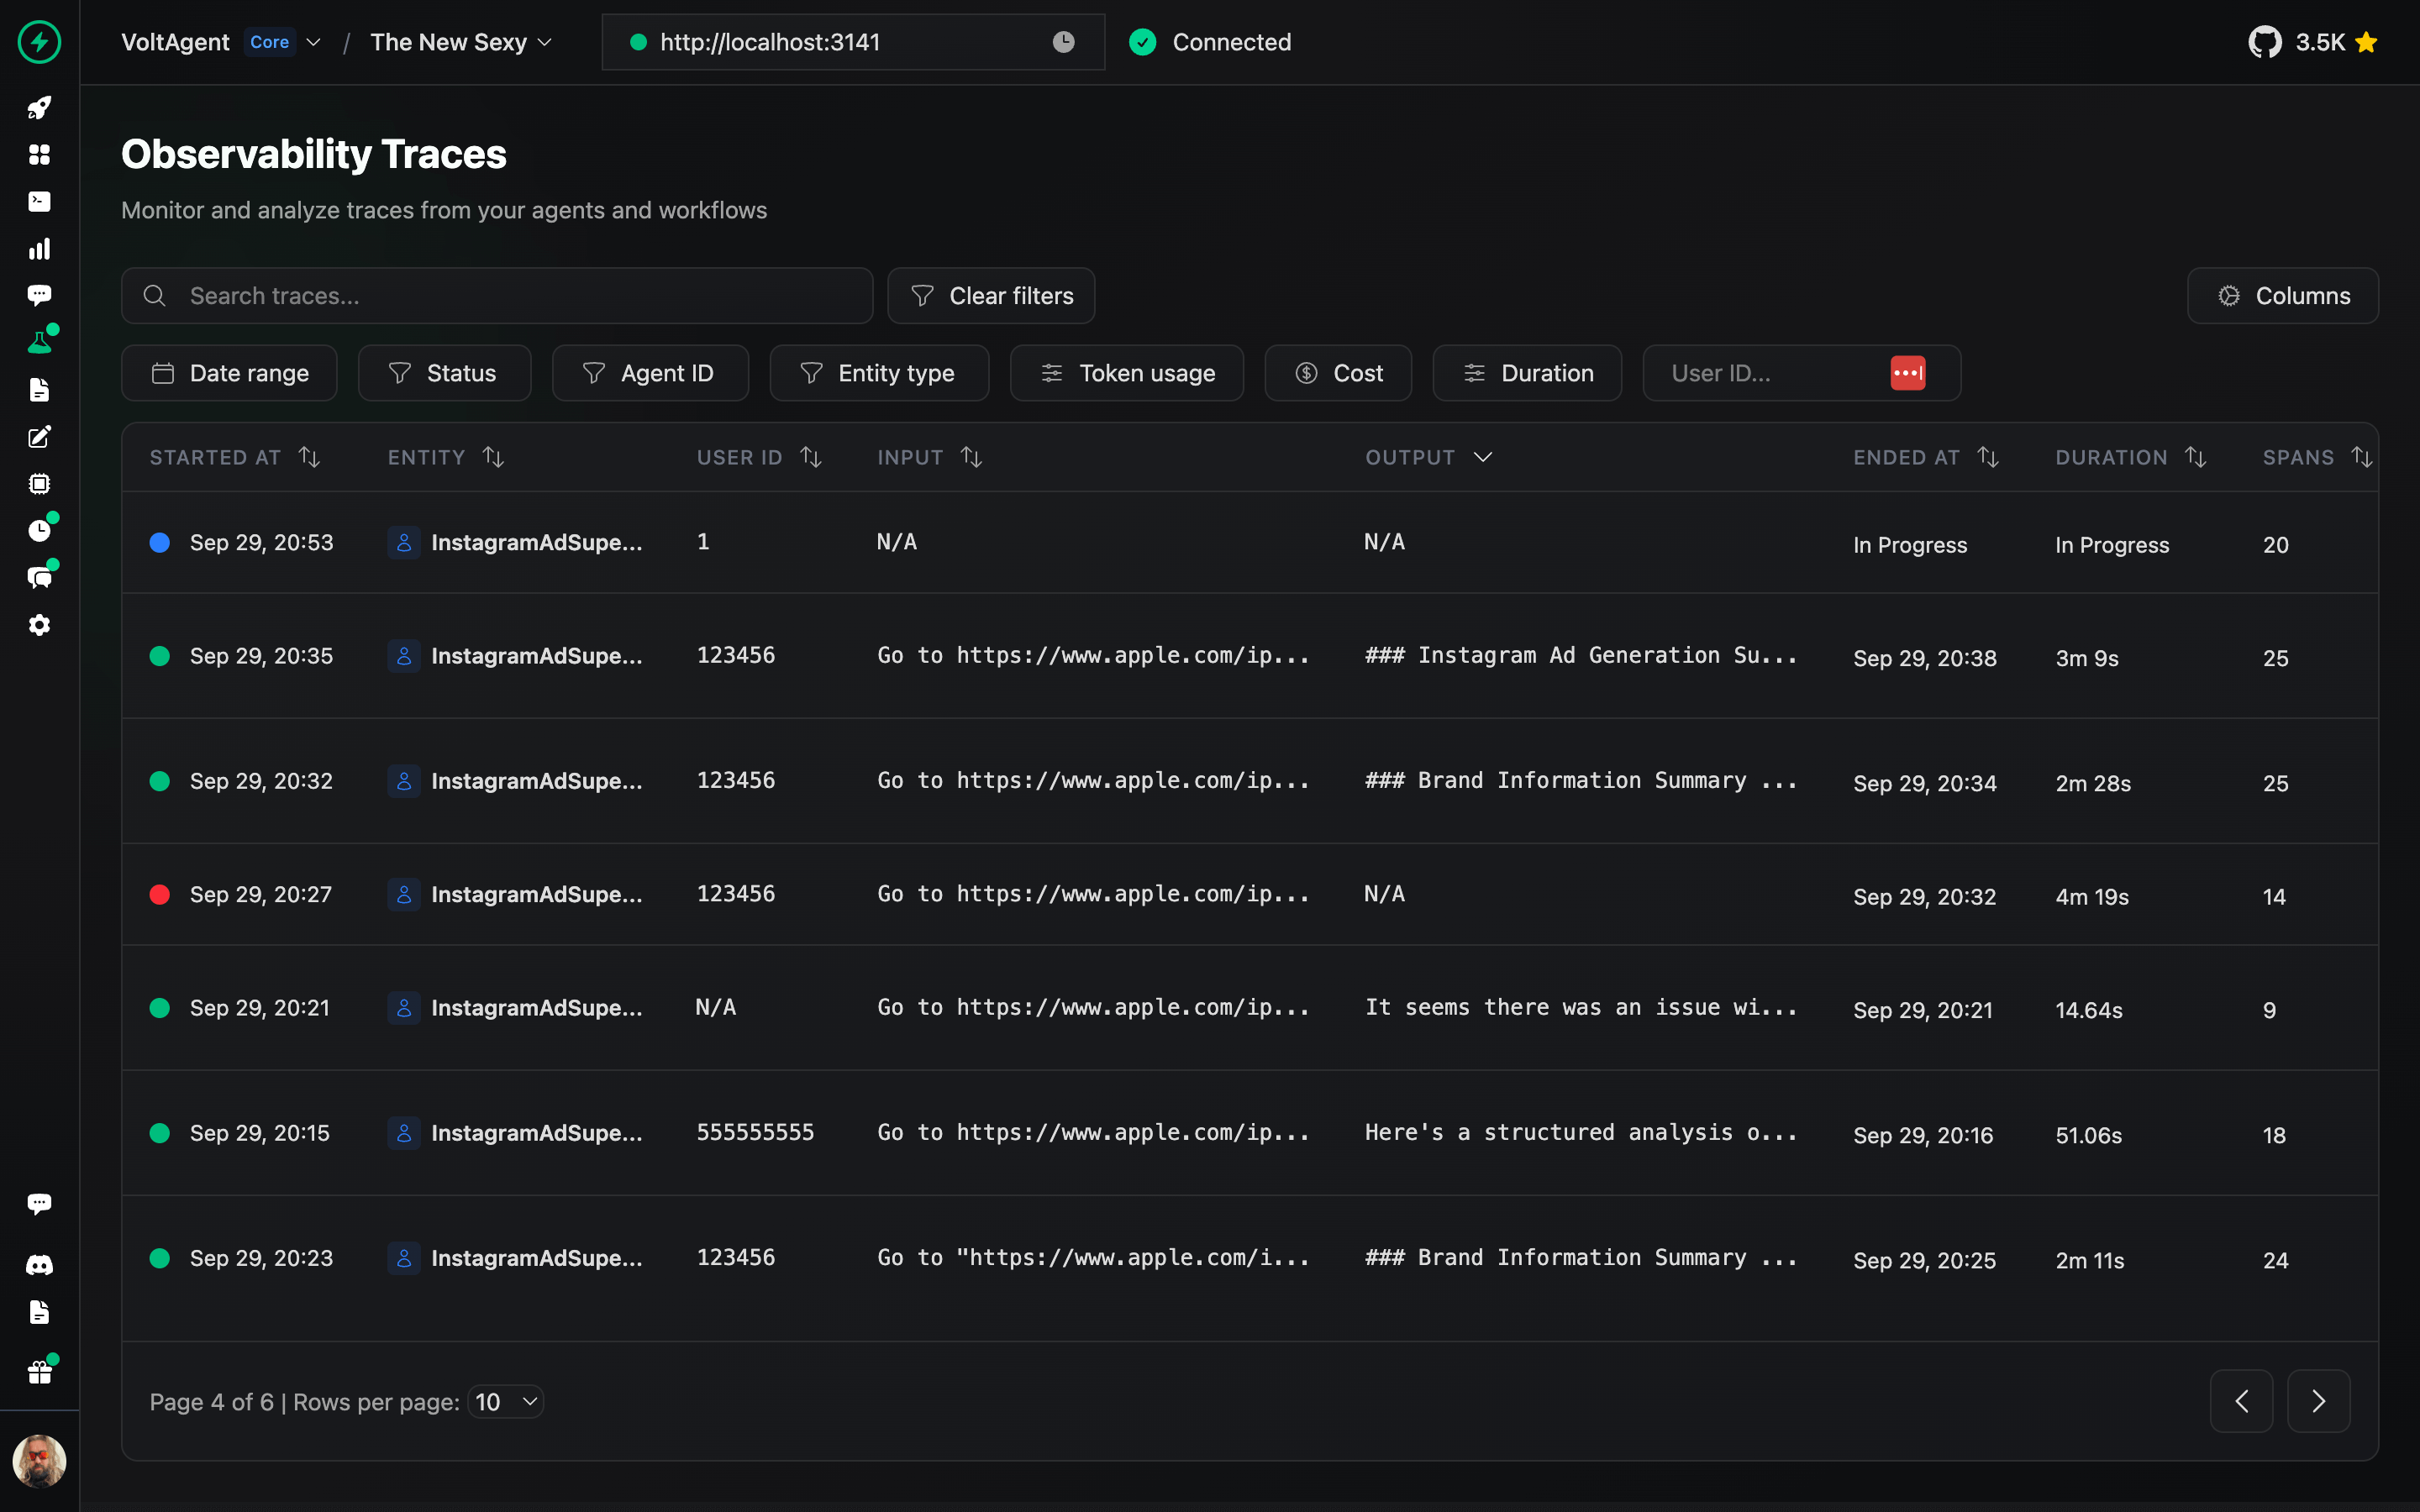
Deep dive into agent execution flow with detailed traces and performance metrics.

Get a comprehensive overview of all your agents, workflows, and system performance metrics.

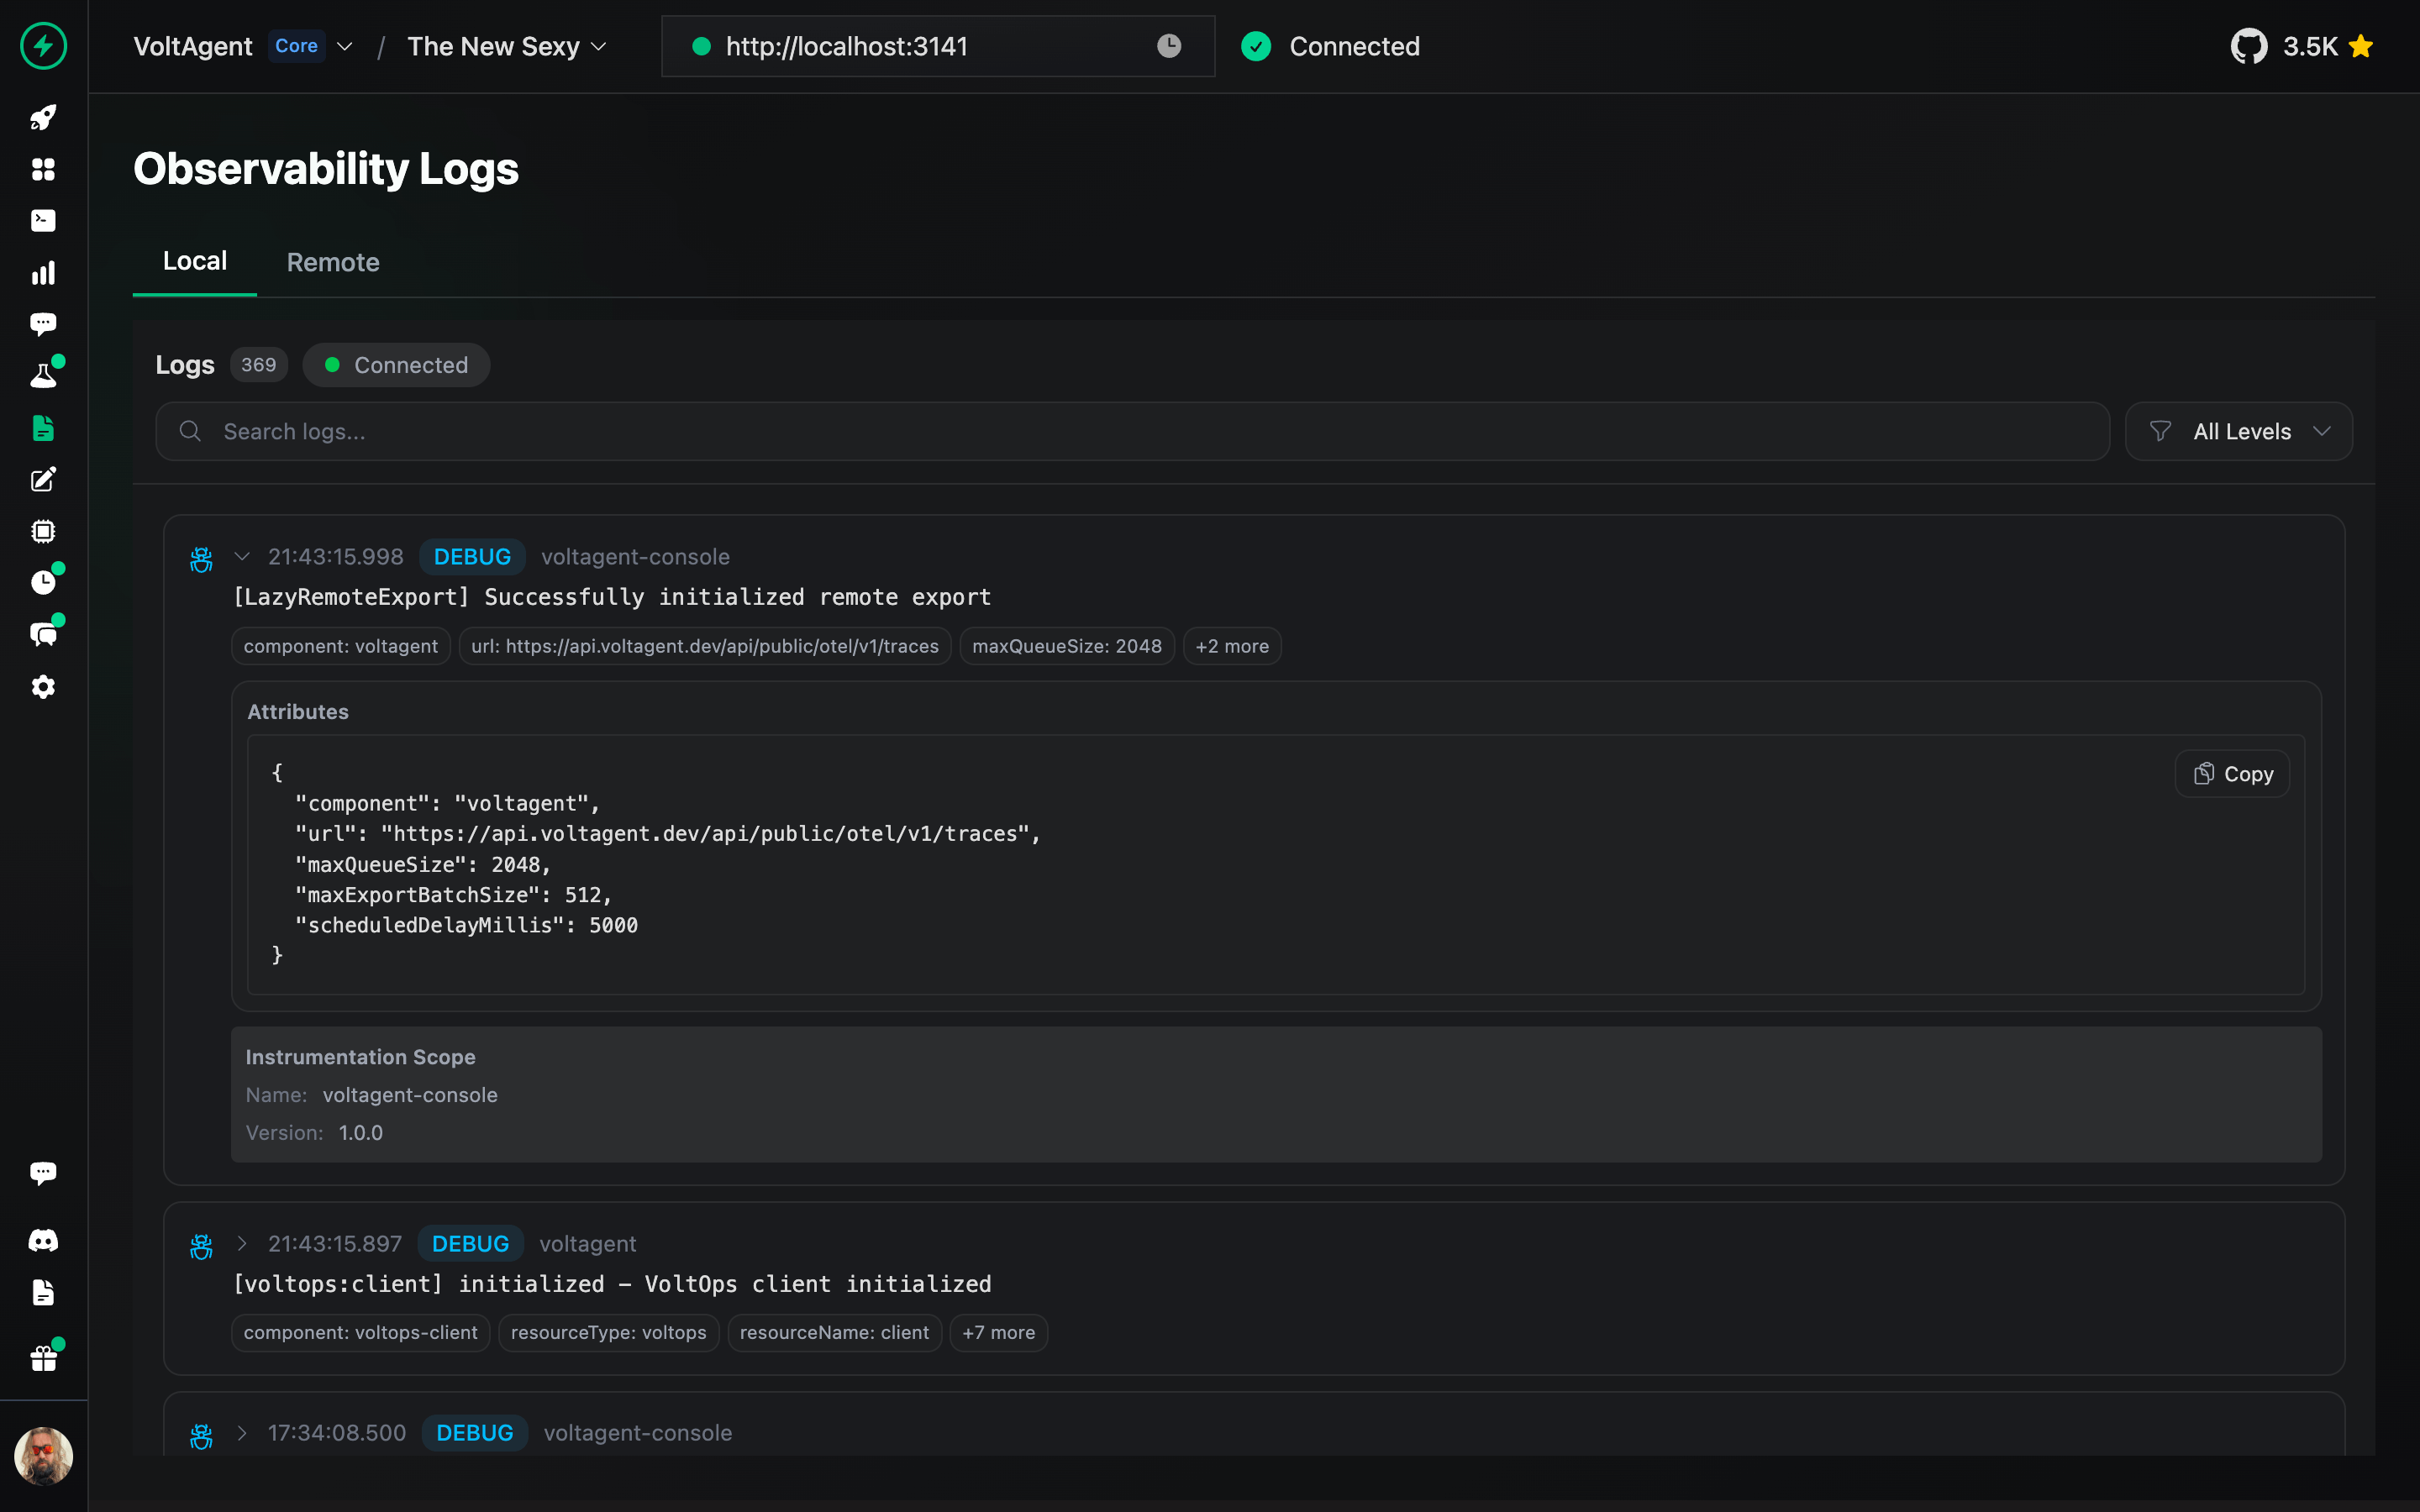
Track detailed execution logs for every agent interaction and workflow step.
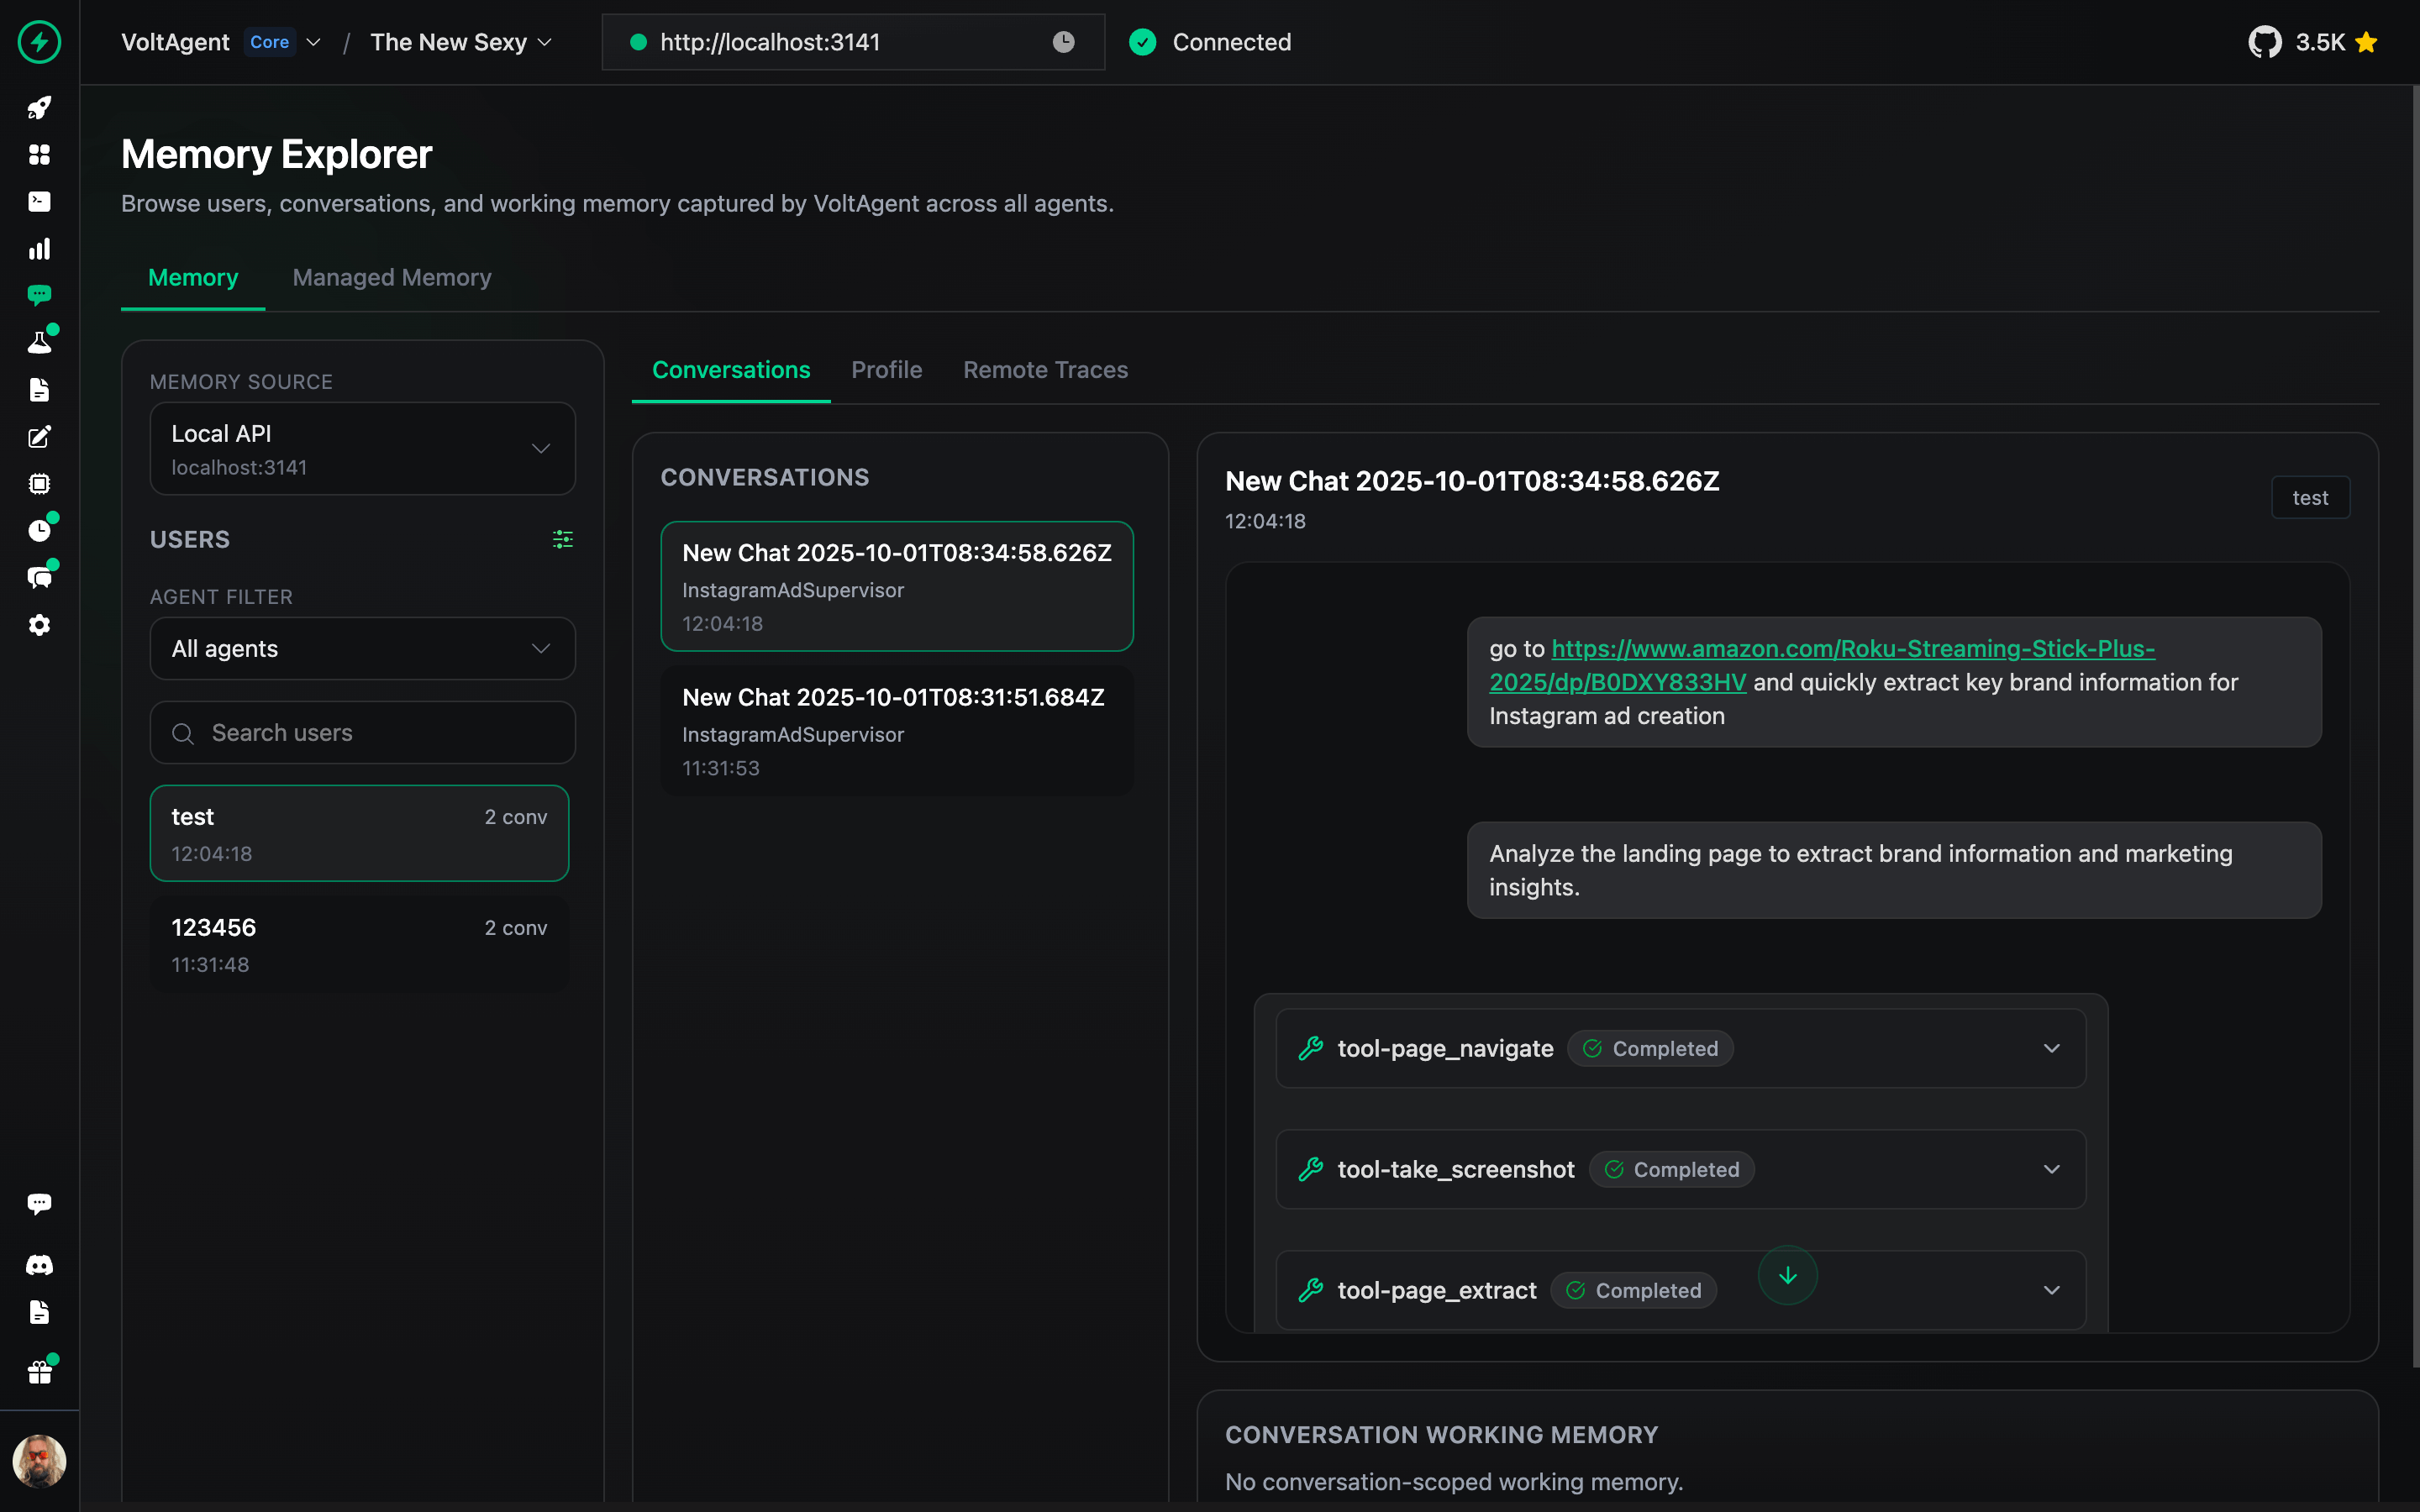
Inspect and manage agent memory, context, and conversation history.
Analyze complete execution traces to understand agent behavior and optimize performance.
Design, test, and refine prompts directly in the console.

Deploy your agents to production with one-click GitHub integration and managed infrastructure.

📖 VoltOps Deploy Documentation
Automate agent workflows with webhooks, schedules, and custom triggers to react to external events.

Monitor agent health, performance metrics, and resource usage across your entire system.

Set up safety boundaries and content filters to ensure agents operate within defined parameters.

Run evaluation suites to test agent behavior, accuracy, and performance against benchmarks.

Connect your agents to knowledge sources with built-in retrieval-augmented generation capabilities.

- Start with interactive tutorial to learn the fundamentals building AI Agents.
- Documentation: Dive into guides, concepts, and tutorials.
- Examples: Explore practical implementations.
- Blog: Read more about technical insights, and best practices.
We welcome contributions! Please refer to the contribution guidelines (link needed if available). Join our Discord server for questions and discussions.
Big thanks to everyone who's been part of the VoltAgent journey, whether you've built a plugin, opened an issue, dropped a pull request, or just helped someone out on Discord or GitHub Discussions.
VoltAgent is a community effort, and it keeps getting better because of people like you.
Licensed under the MIT License, Copyright © 2026-present VoltAgent.