Easy object detection, framing and obfuscation with Swift

The light gray boxes at the top of the architecture diagram above are the public interface into DetectorKit. Through these you can easily access the core features of detecting, framing and obfuscating faces and text within images.
// Detect all faces within an image
let faceDetector = FaceDetector(image)

// Then you can easily access the faces (as CIFeatures)
let faces = faceDetector.faces

// Access underlying CIDetector
let detector = faceDetector.detectorlet faceFramer = FaceFramer(imageView)
// Change color and borderWidth
// Note: borderWidth only works for box() and radial()
faceFramer.shapeColor = UIColor.red
faceFramer.borderWidth = 2.0
// Frame faces with a rectangle
faceFramer.box()
// or with a radial frame
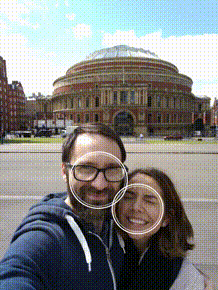
faceFramer.radial()
// or with a pulsing circle
faceFramer.pulse()
// or with rotating boxes
faceFramer.boxRotate()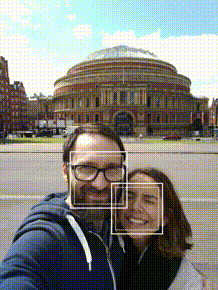
let faceObscure = FaceObscure(image)
// pixelate all faces within an image
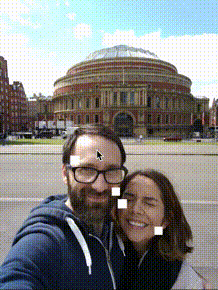
faceObscure.pixelate()
// or use a crystalize filter
faceObscure.crystalize()![]()

The easiest way the use DetectorKit is with CocoaPods
To integrate DetectorKit into your Xcode project using CocoaPods, specify it in your Podfile
platform :ios, '10.0'

target 'TargetName' do
  pod 'DetectorKit'
end
Then, run the following command:
$ pod installFor an example app implementing the above usage, take a look at Sherlock
DetectorKit is released under the MIT license. See LICENSE for details.